



介绍
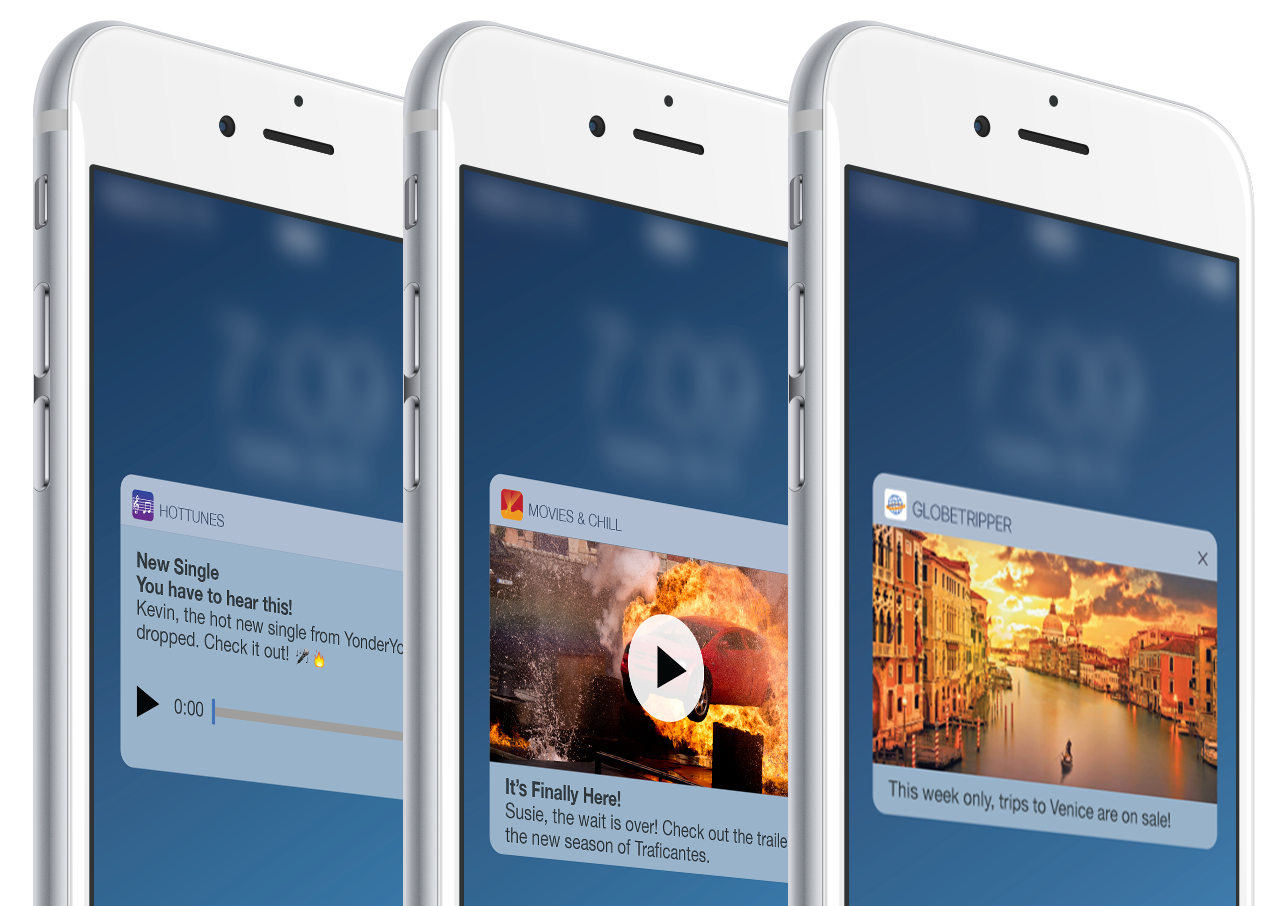
如今,拥有一款视觉效果惊艳的移动应用还不够。要让您的移动应用取得成功,就必须将用户体验 (UX) 融入设计之中。即使消费者未使用应用,推送通知也是与他们互动的绝佳方式。
本指南将引导您完成设置项目以实现丰富的推送通知,您将了解一些服务器端要求,我们将探索无限的可能性!
设置
为了开始使用推送通知,您需要遵循以下步骤:
- 打开现有的 Xcode 项目或创建新项目。选择您的项目目标并转到功能以启用推送通知,如下所示。
- 打开Keychain Access > 证书助手 > 从证书颁发机构请求证书...填写必填字段并选择通过电子邮件将请求发送给 CA 或将其保存到磁盘。转到您的 Apple 会员中心并找到您的 App ID。您将看到“推送通知”服务现在处于可配置状态。选择编辑按钮。在推送通知部分下,有两个证书选项,如下所示。选择创建证书按钮以创建您的证书。
开发证书- 从 Xcode 构建的应用程序将收到通知。
生产证书- 从 Apple Store 或 Test Flight 安装的应用程序将收到通知。
- 上传您之前保存在磁盘上或通过电子邮件发送给证书颁发机构的.certSigningRequest文件,下载生成的证书,然后双击.cer文件将其安装在您的 Keychain Access 中。
- 在 Keychain Access 的“证书”部分下找到您的证书,然后按照此处所示将其导出。您的证书现在保存为 .p12 文件。如果您需要将证书保存为.pem/.p8文件,您可以轻松将其转换
$ openssl pkcs12 -in CertName.p12 -out CertName.pem -nodes -clcerts
注册推送通知
就像在您的 AppDelegate 文件中那样:
      import UIKit
import UserNotifications

@UIApplicationMain
class AppDelegate: UIResponder, UIApplicationDelegate, UNUserNotificationCenterDelegate {

    var window: UIWindow?

func application(_ application: UIApplication, didFinishLaunchingWithOptions launchOptions: [UIApplicationLaunchOptionsKey: Any]?) -> Bool {

    UNUserNotificationCenter.current().delegate = self

    if #available(iOS 10, *) {
        UNUserNotificationCenter.current().requestAuthorization(options:[.badge, .alert, .sound]) { granted, error in }
    } else {
       application.registerUserNotificationSettings(UIUserNotificationSettings(types: [.badge, .sound, .alert], categories: nil))
    }
    application.registerForRemoteNotifications()
    return true
 }
...
在您的 AppDelegate.swift 文件中添加didRegisterForRemoteNotificationsWithDeviceToken函数以获取将接收通知的 deviceToken。
      ...
func application(_ application: UIApplication, didRegisterForRemoteNotificationsWithDeviceToken deviceToken: Data) {
   let deviceTokenString = deviceToken.reduce("") { $0 + String(format: "%02X", $1) }
   print("APNs device token: \(deviceTokenString)")
}
...
太棒了!现在是时候让它们看起来超级好看了。🙀
显示推送通知
您的通知界面应该感觉像是包含应用程序的自然延伸!
发送媒体附件的一个非常重要的步骤是服务器推送负载中的可变内容键。让我们来看看这个示例负载。
      {
   "aps": {
       "alert": "Hello!",
       "sound": "default",
       "mutable-content": 1,
       "badge": 1
   },
   "data": {
       "attachment-url": "https://example.com/attachment.jpg"
   }
}
从Xcode > File > New > Target...中选择Notification Service Extension并激活建议的方案。请注意,现在有两个自动生成的文件 - NotificationService.swift和Info.plist。
在NotificationService.swift文件中,我们需要处理来自有效负载的媒体 URL。例如,我们可以使用 FileManager:
      ...
override func didReceive(_ request: UNNotificationRequest, withContentHandler contentHandler: @escaping (UNNotificationContent) -> Void) {
        self.contentHandler = contentHandler
        bestAttemptContent = (request.content.mutableCopy() as? UNMutableNotificationContent)

        func failEarly() {
            contentHandler(request.content)
        }

        guard let content = (request.content.mutableCopy() as? UNMutableNotificationContent) else {
            return failEarly()
        }

        guard let apnsData = content.userInfo["data"] as? [String: Any] else {
            return failEarly()
        }

        guard let attachmentURL = apnsData["attachment-url"] as? String else {
            return failEarly()
        }

        guard let imageData = NSData(contentsOf:NSURL(string: attachmentURL)! as URL) else { return failEarly() }
        guard let attachment = UNNotificationAttachment.create(imageFileIdentifier: "image.gif", data: imageData, options: nil) else { return failEarly() }

        content.attachments = [attachment]
        contentHandler(content.copy() as! UNNotificationContent)
    }
...
...这个UNNotificationAttachment扩展函数用于将媒体保存到磁盘:
      extension UNNotificationAttachment {
    static func create(imageFileIdentifier: String, data: NSData, options: [NSObject : AnyObject]?) -> UNNotificationAttachment? {

            let fileManager = FileManager.default
            let tmpSubFolderName = ProcessInfo.processInfo.globallyUniqueString
            let fileURLPath      = NSURL(fileURLWithPath: NSTemporaryDirectory())
            let tmpSubFolderURL  = fileURLPath.appendingPathComponent(tmpSubFolderName, isDirectory: true)

            do {
                try fileManager.createDirectory(at: tmpSubFolderURL!, withIntermediateDirectories: true, attributes: nil)
                let fileURL = tmpSubFolderURL?.appendingPathComponent(imageFileIdentifier)
                try data.write(to: fileURL!, options: [])
                let imageAttachment = try UNNotificationAttachment.init(identifier: imageFileIdentifier, url: fileURL!, options: options)
                return imageAttachment
            } catch let error {
                print("error \(error)")
            }

        return nil
    }
}
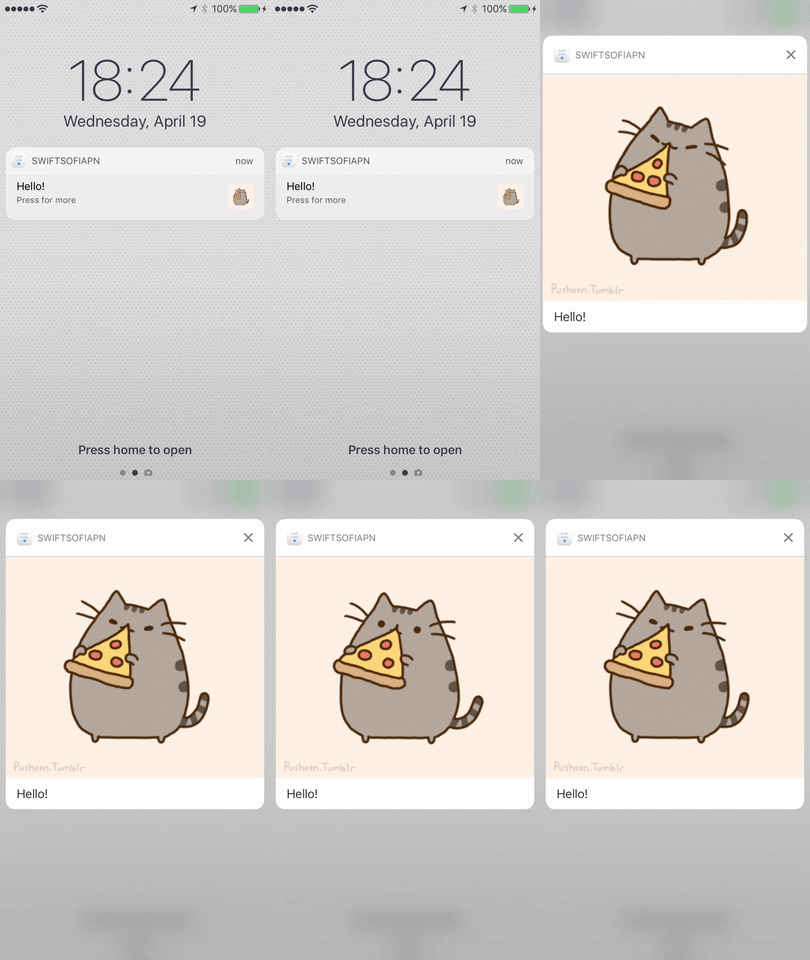
瞧!
添加操作以推送通知
让我们为 Rich Push Notifications 添加一些操作。通过添加“category”键来修改有效负载,以通知我们想要显示操作。
      {
   "aps": {
       "alert": "Hello!",
       "sound": "default",
       "mutable-content": 1,
       "badge": 1,
       "category": "myCategoryName"
   },
   "data": {
       "attachment-url": "https://example.com/attachment.jpg"
   }
}
在自动生成的通知服务Info.plist中,添加一个 UNNotificationExtensionCategory 数组,其中包含最多 4 个操作标识符。在下图中,它们可以看作是“Item 0”和“Item 1”:

在NotificationService.swift文件中的didReceiveRequest函数中调整通知类别:
      ...
let meowAction = UNNotificationAction(identifier: "meow", title: "Meow", options: [])
let pizzaAction = UNNotificationAction(identifier: "pizza", title: "Pizza?", options: [])

let category = UNNotificationCategory(identifier: "myCategoryName", actions: [meowAction, pizzaAction], intentIdentifiers: [], options: [])
UNUserNotificationCenter.current().setNotificationCategories([category])
...
就这么简单!🎉 预览时间到了:
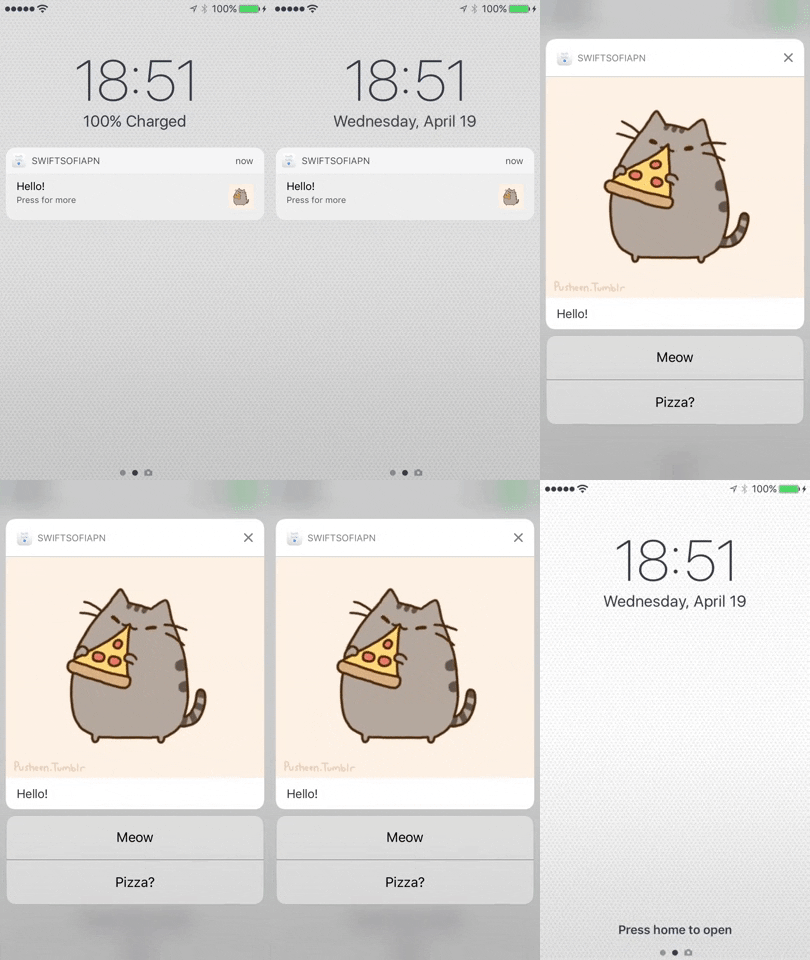
最后,在AppDelegate.swift文件中添加通知按钮的逻辑,使用我们之前在Info.plist文件中指定的标识符。我们调用的方法是来自UNUserNotificationCenterDelegate的didReceive 响应
      ...
func userNotificationCenter(_ center: UNUserNotificationCenter, didReceive response: UNNotificationResponse, withCompletionHandler completionHandler: @escaping () -> Void) {

        if response.actionIdentifier == "meow" {
            ...
        }
        if response.actionIdentifier == "pizza" {
            ...
        }
        completionHandler()
    }
...
警告!别忘了在需要时更新徽章图标数量!
application.applicationIconBadgeNumber = 0
自定义预览
最后,让我们从Xcode > File > New > Target...添加自定义通知预览,选择通知内容并激活建议的方案。现在我们有了NotificationViewController.swift、MainInterface.storyboard和Info.plist文件。
结论
免责声明:本内容来源于第三方作者授权、网友推荐或互联网整理,旨在为广大用户提供学习与参考之用。所有文本和图片版权归原创网站或作者本人所有,其观点并不代表本站立场。如有任何版权侵犯或转载不当之情况,请与我们取得联系,我们将尽快进行相关处理与修改。感谢您的理解与支持!